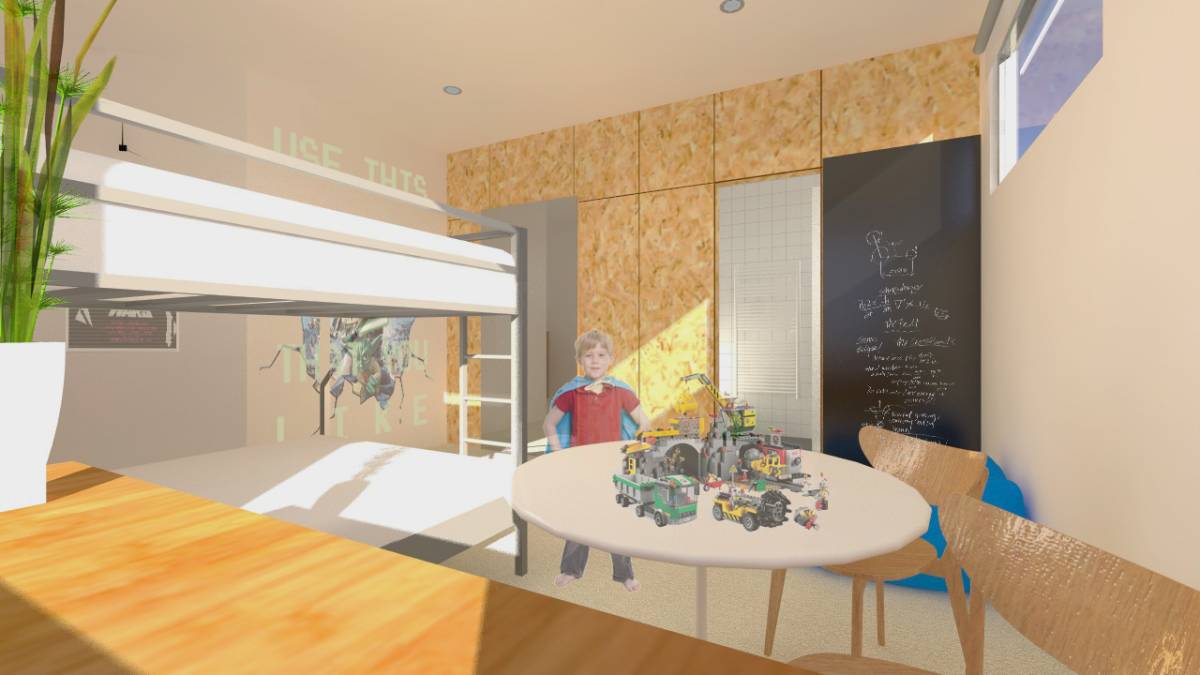
First of all thank you for this opportunity and I sincerely hope that you and the kids will love it.
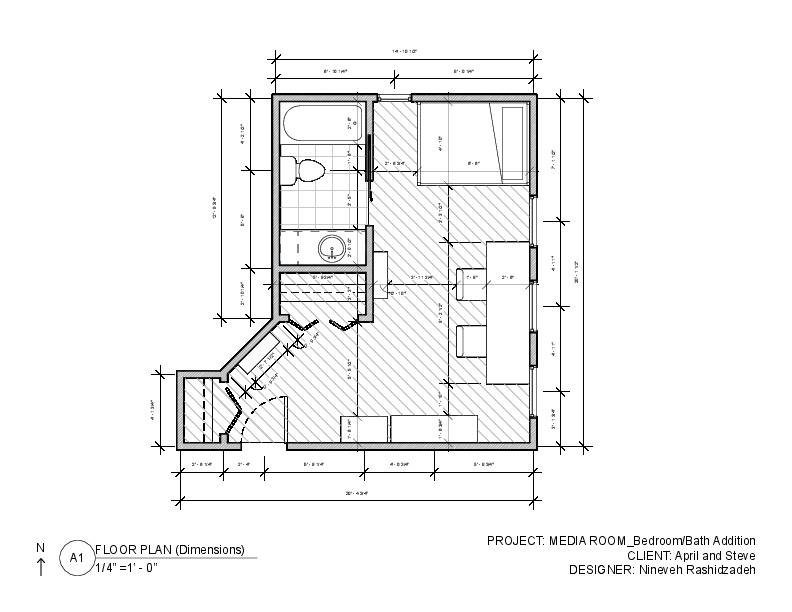
Please read carefully while analyzing the plans and pictures J
FURNISHING AND ZONING
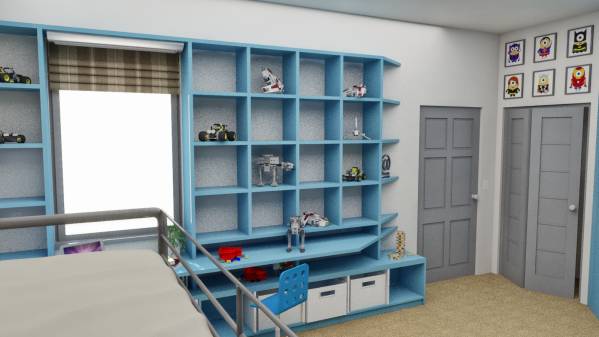
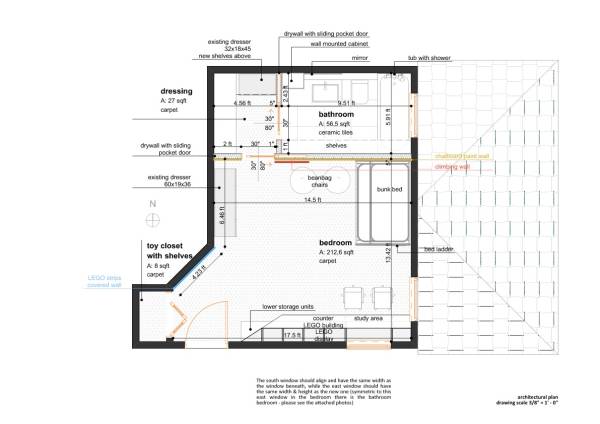
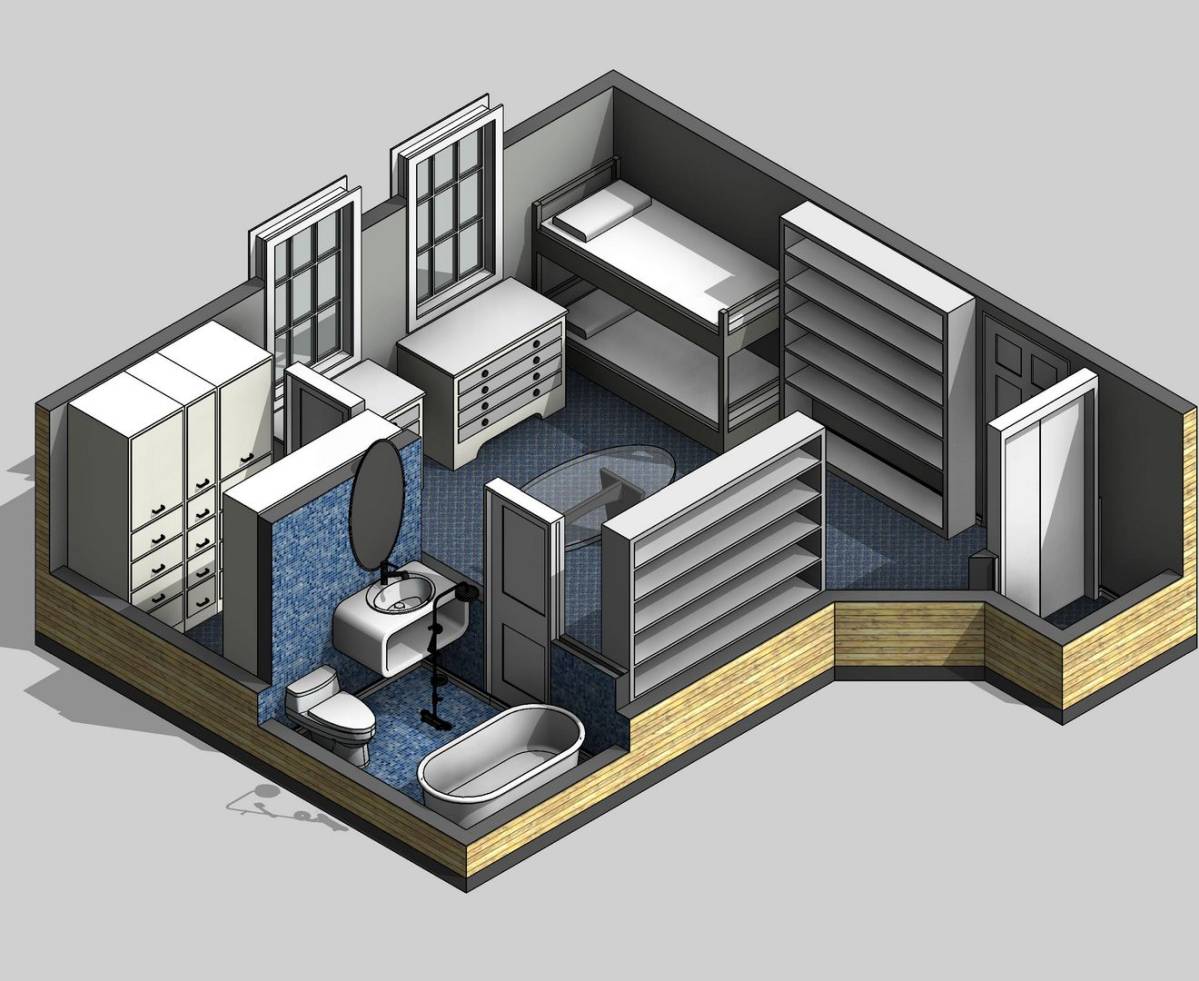
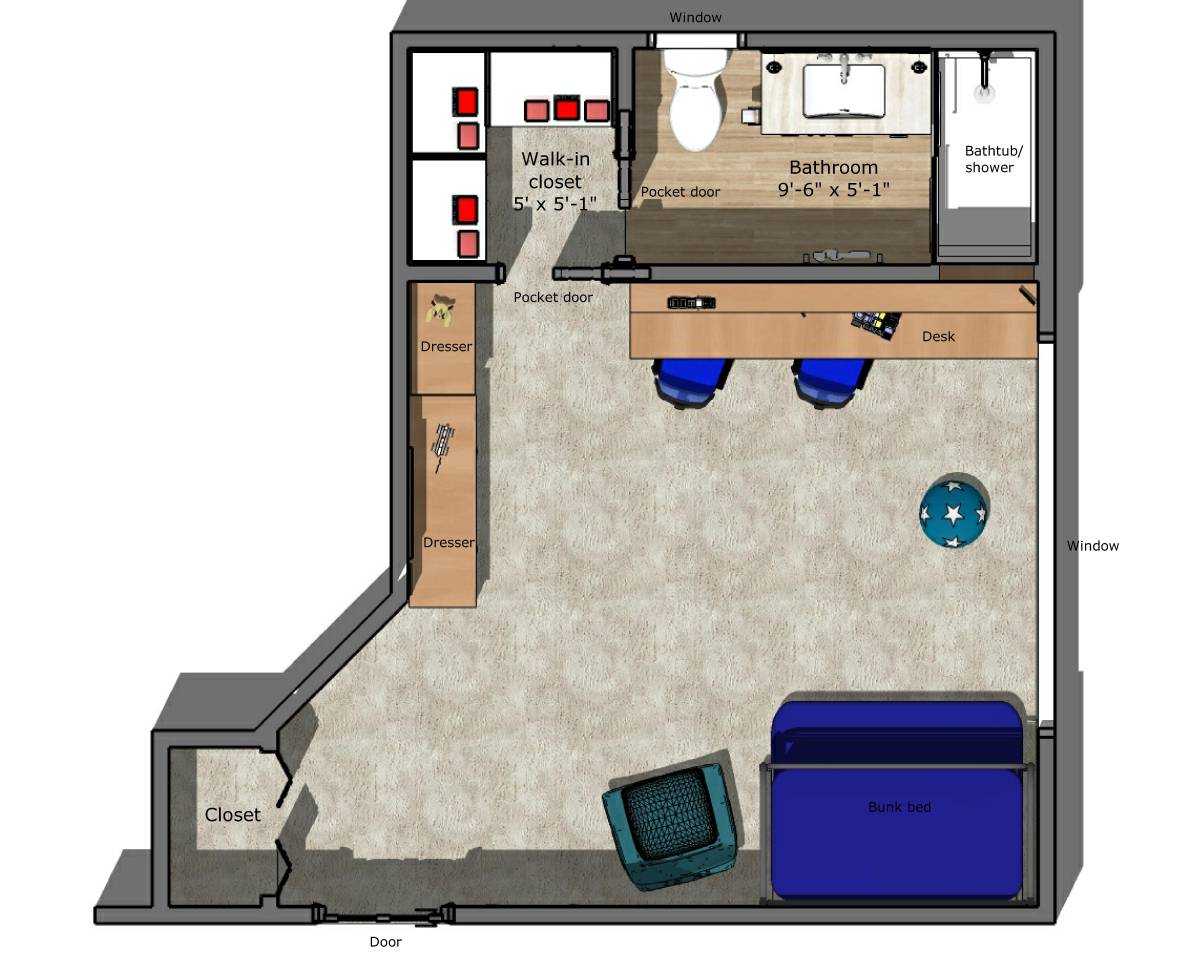
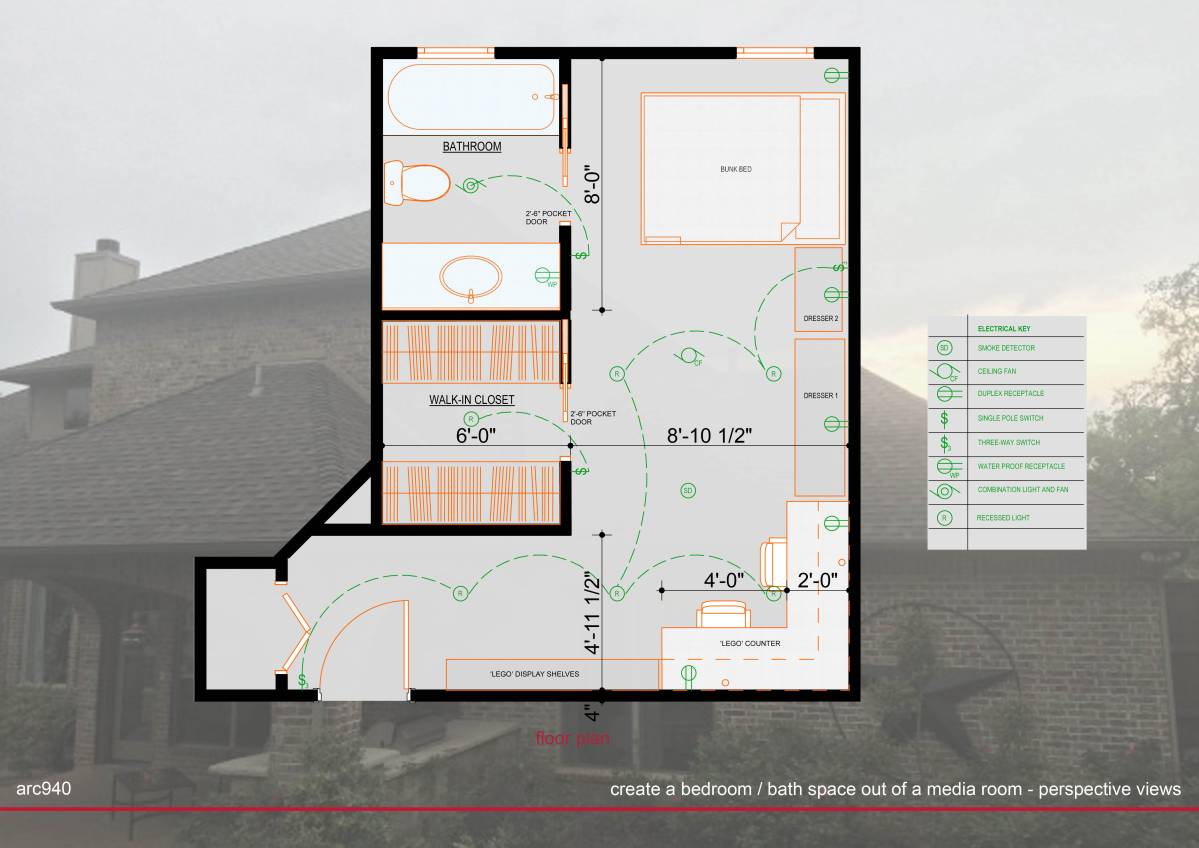
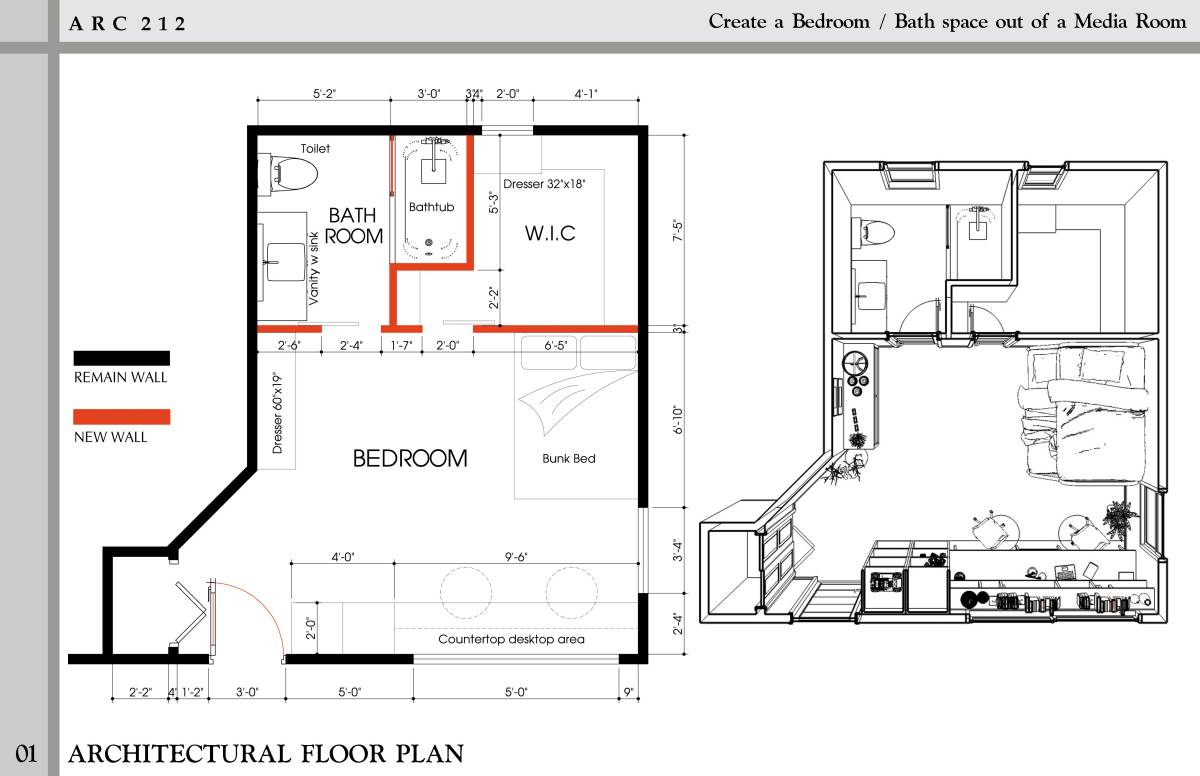
- I chose not to change the main door as it implies additional costs but as a suggestion - it could be mirrored, it has a rather strange opening direction – when you enter, instead of seeing the room you first see the toy closet, but it is strictly your choice.
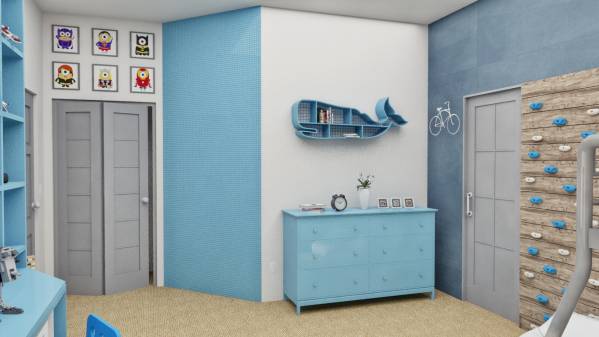
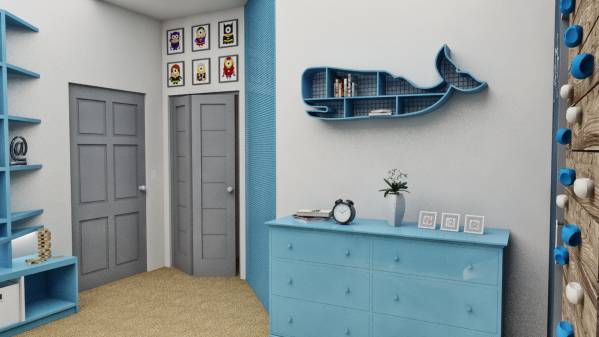
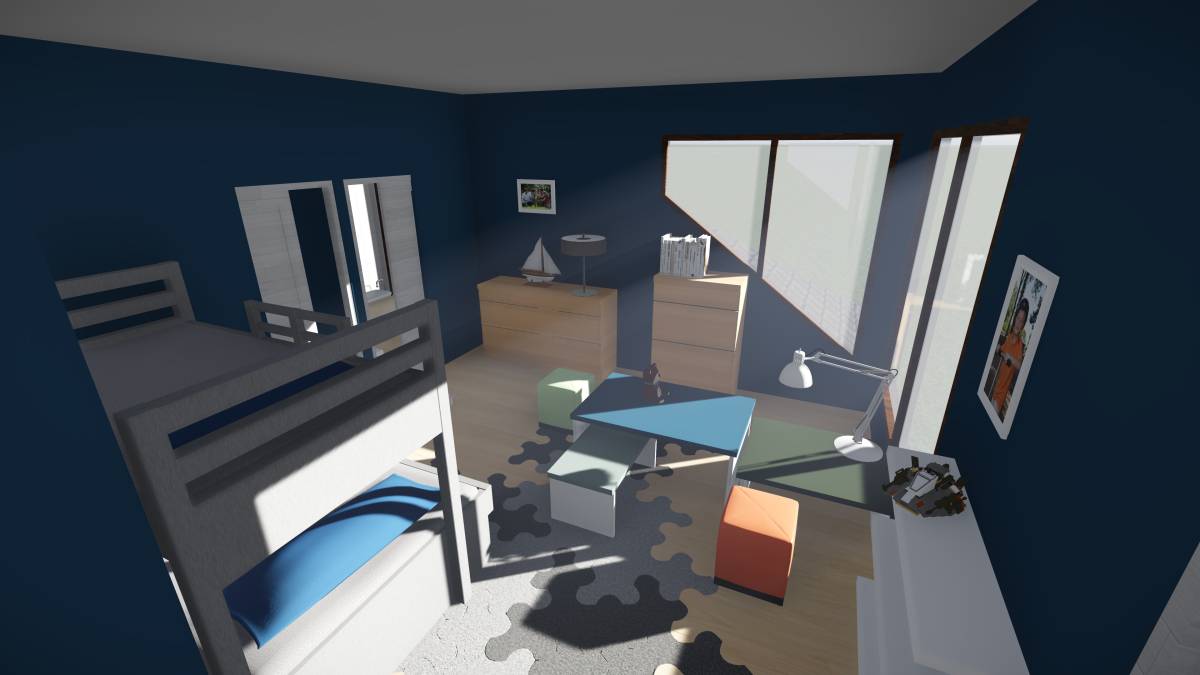
- I used the shorter dresser in the west side of the room but in order to aesthetically fit in you and the kids could have fun and paint it blue (according to the room color scheme, so it does not seem out of place).
- the other dresser is in the walk-in closet and can be used to store socks and undies J I would suggest painting this one white, just like the new shelves.
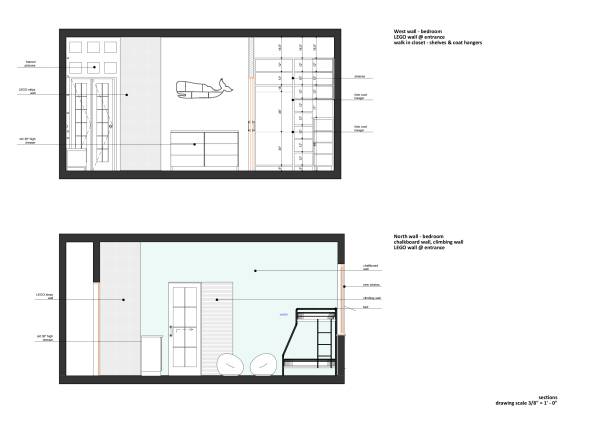
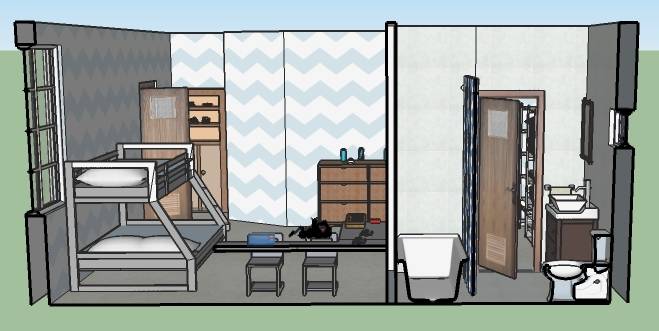
- the walk-in closet consists of some shelves and two stacked coat hangers. It can be accessed from the bedroom through a sliding pocket door.
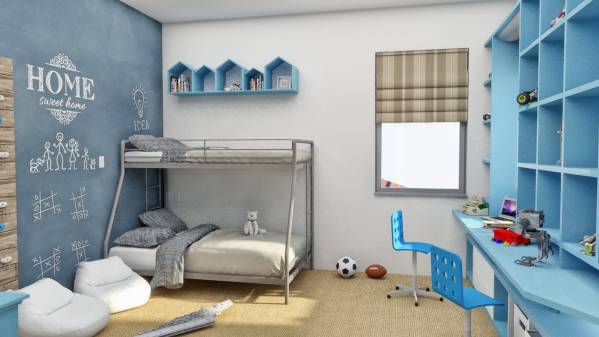
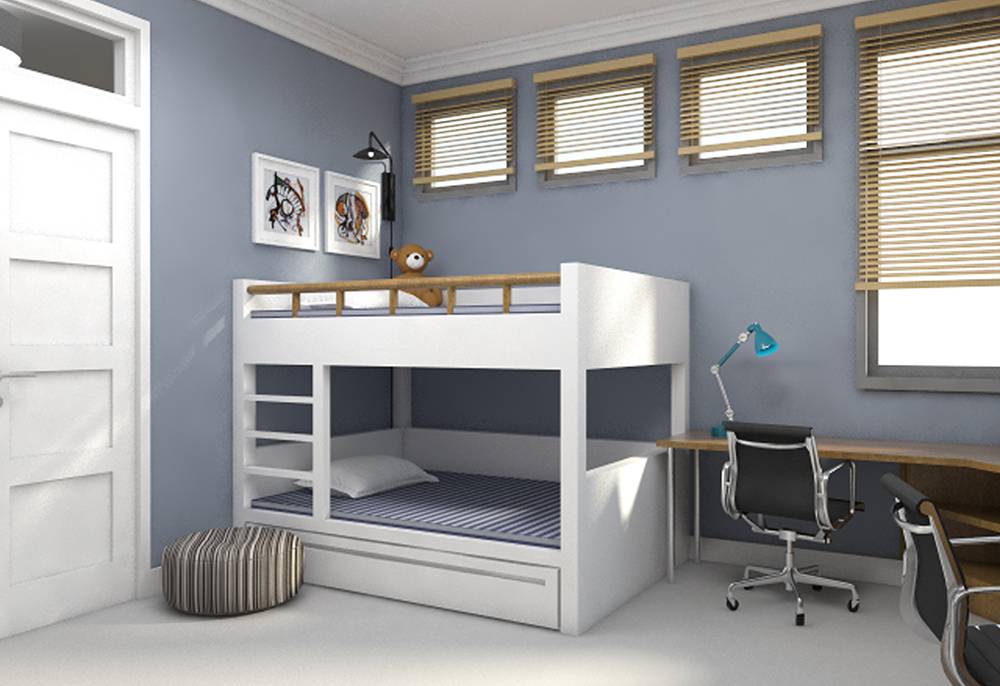
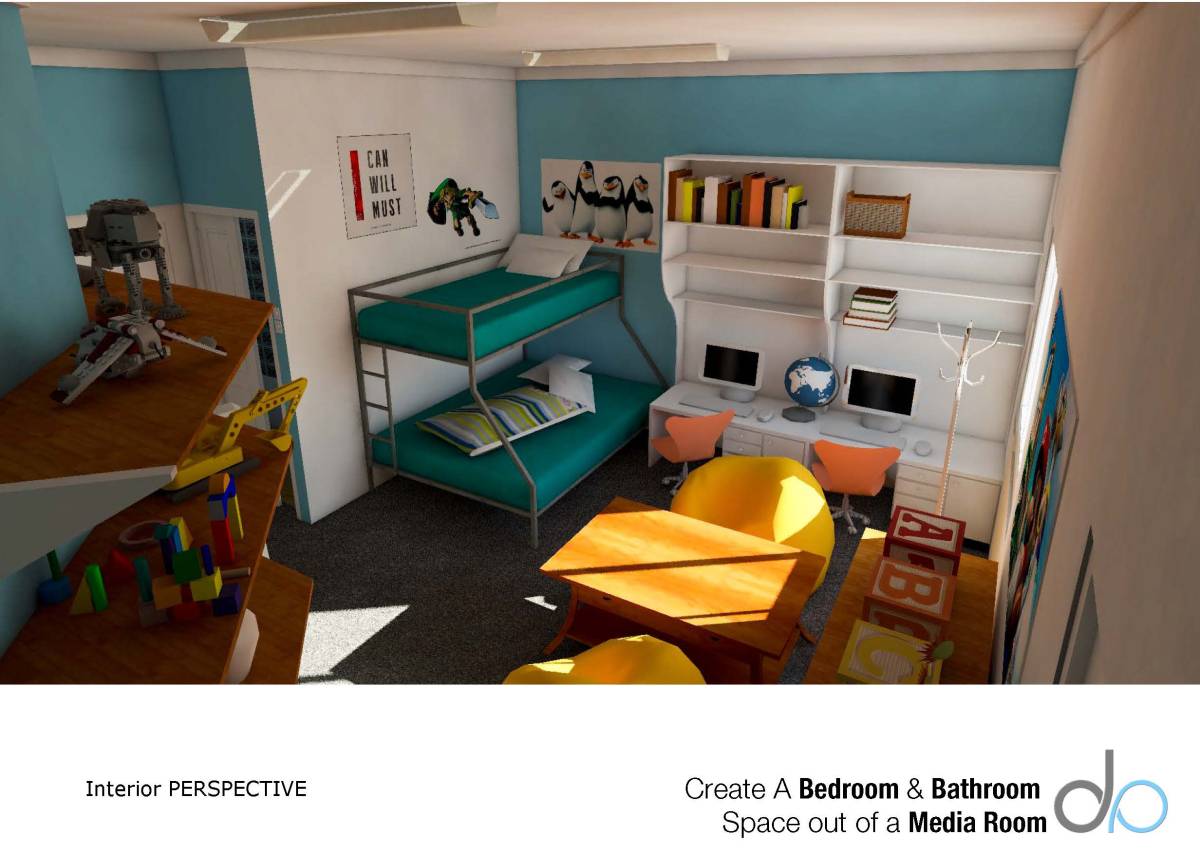
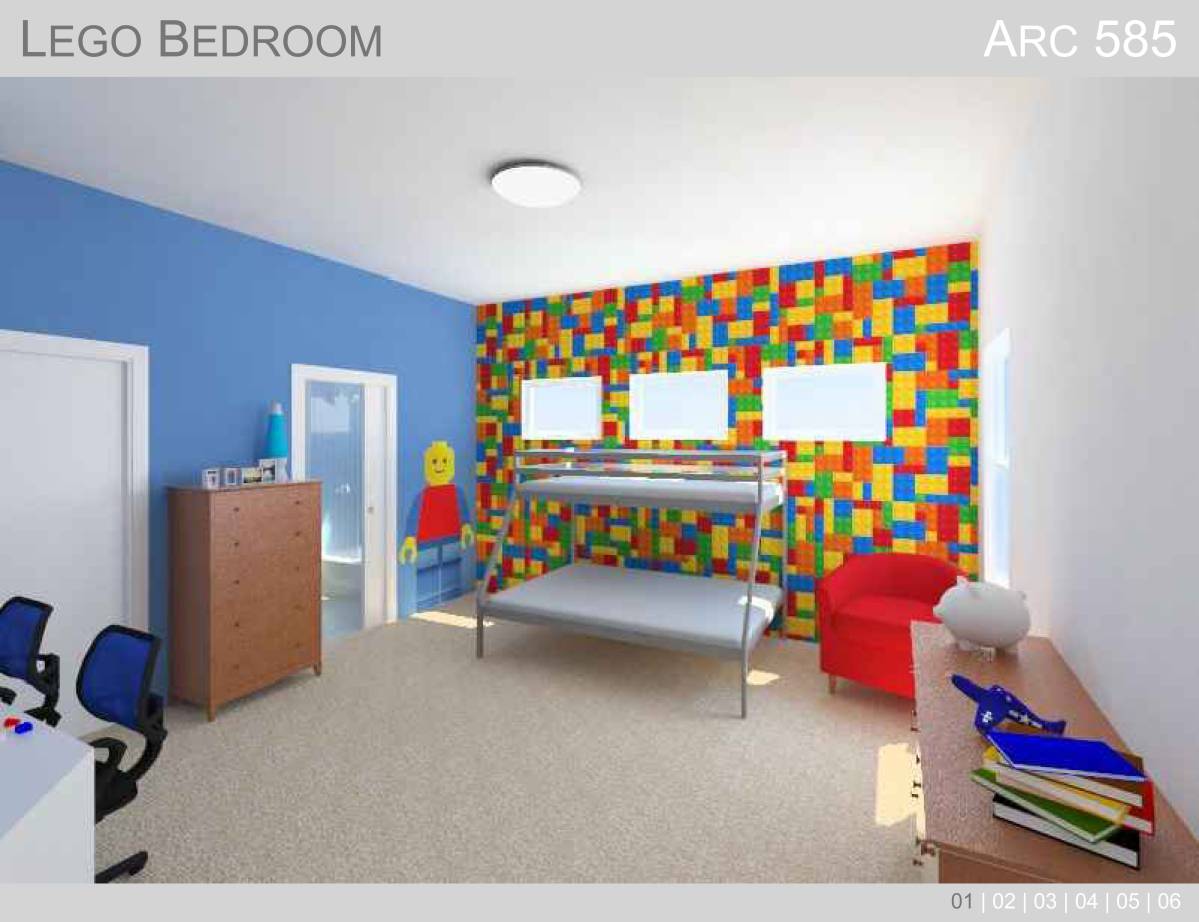
- the bed is placed on the far end of the room, so it can be visible from the entrance
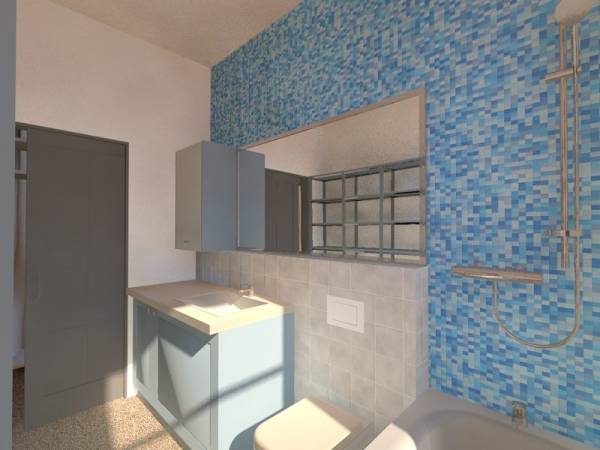
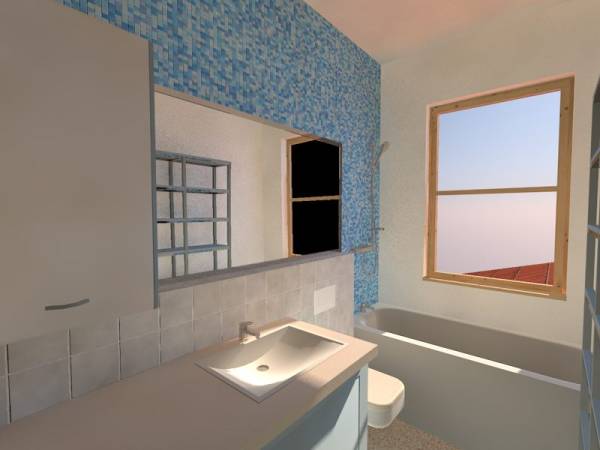
- the Bathroom is on the north east corner for ease of connecting with the existing plumbing on the ground floor. It can be accessed from the walk-in closet through a sliding pocket door.
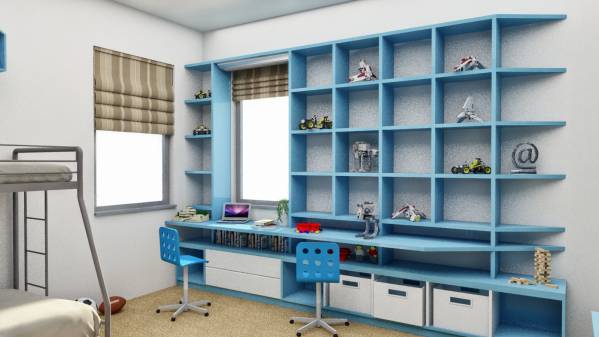
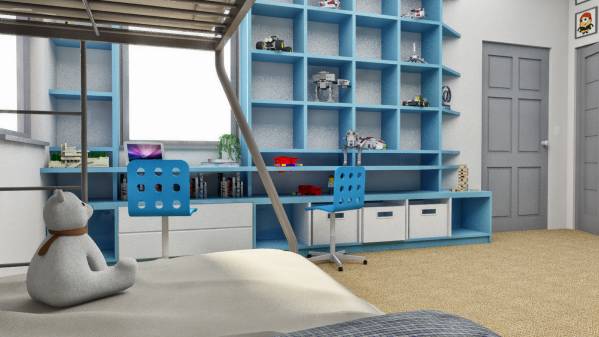
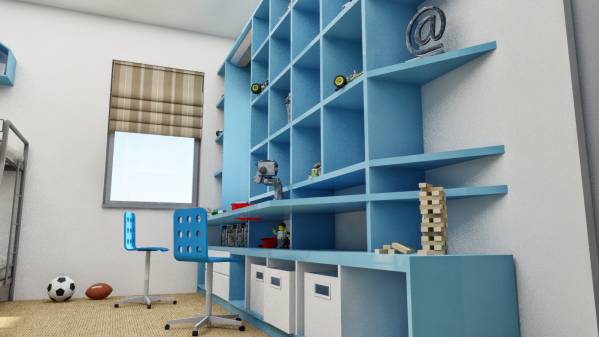
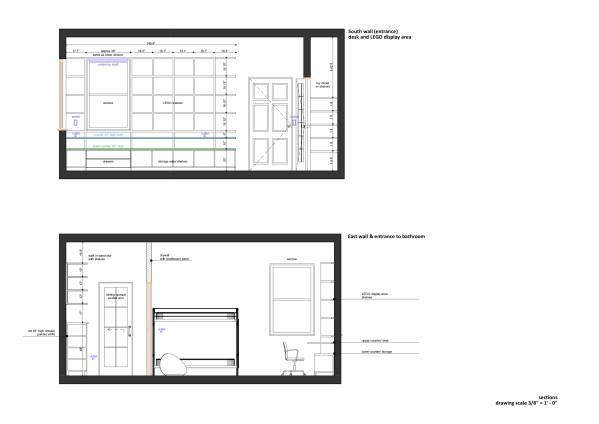
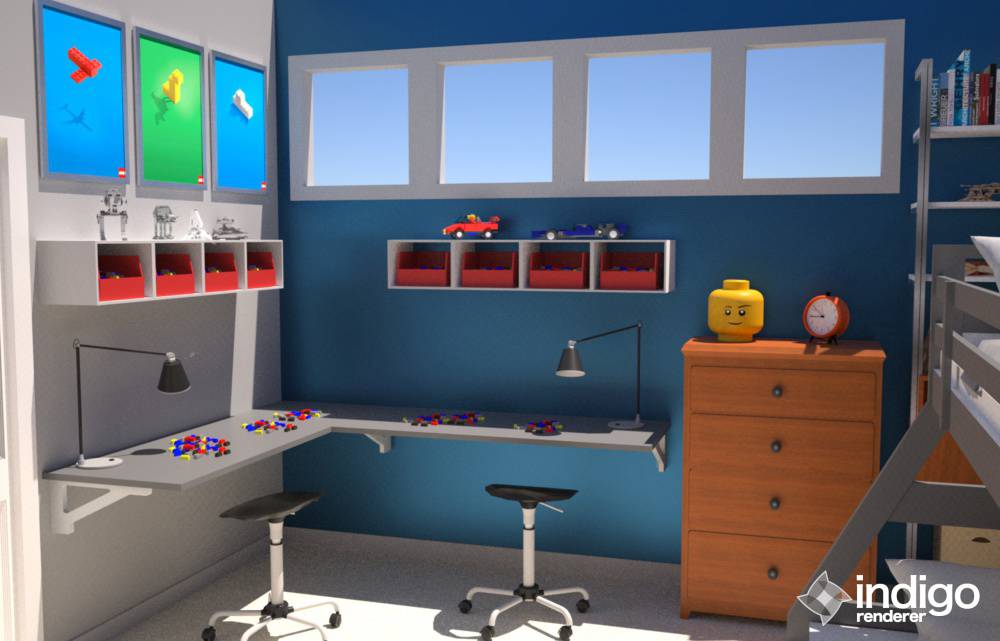
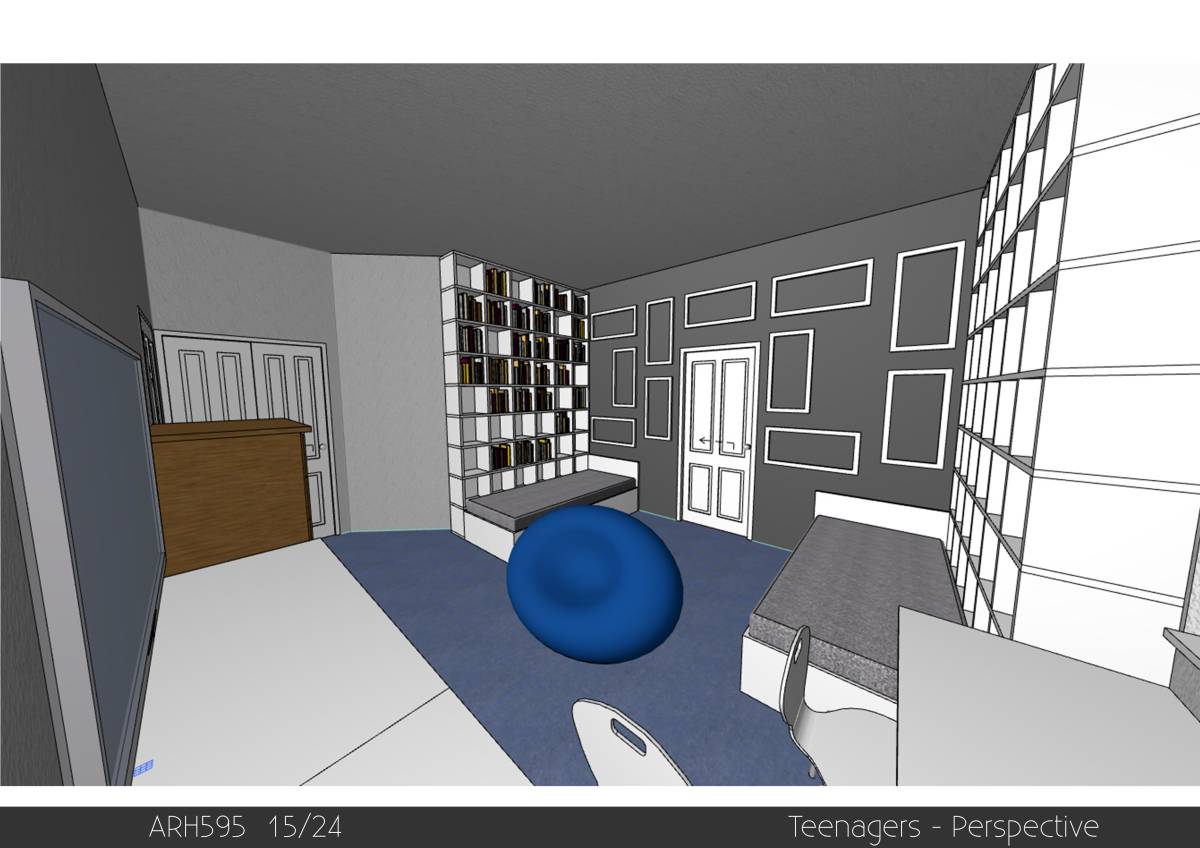
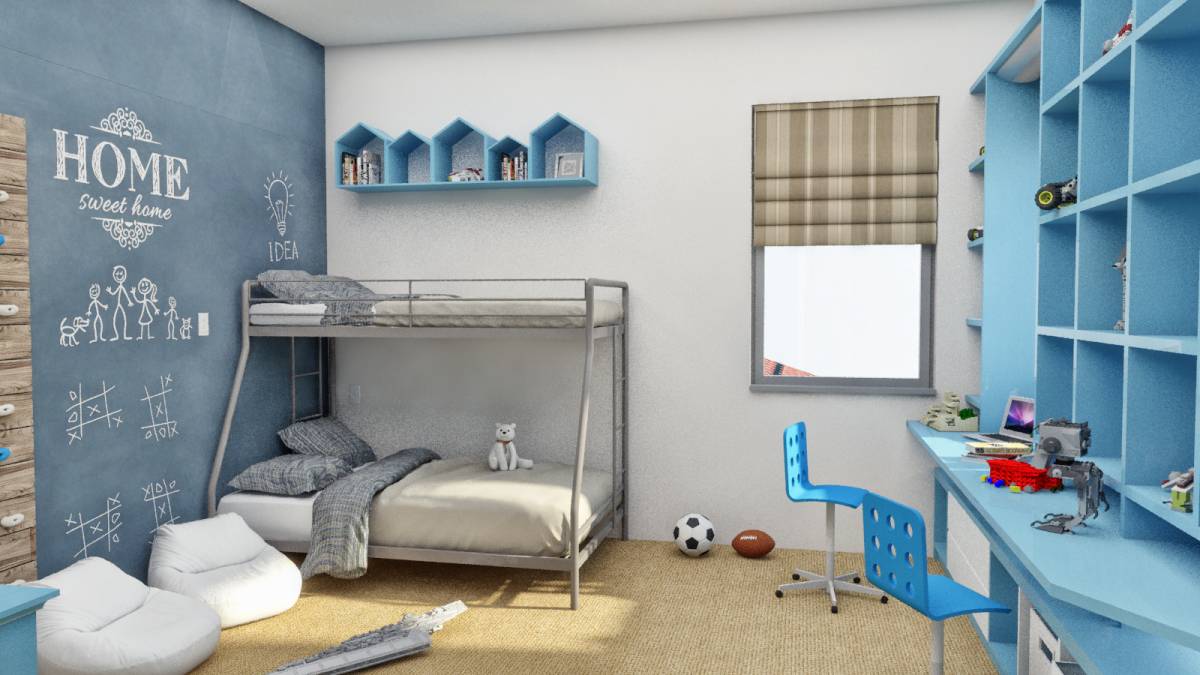
- I have come up with an easy to build and compact solution for the countertop and LEGO wall display area. The countertop acts as a desk for playing/ writing/ drawing etc. (30” high), underneath (18“ high)there is storage space for toys and books, magazines, etc. while above there are shelves for the kids’ creations, toys, books and so on.
- having envisioned this place as a desk/ playing/ learning/ homework area, I placed two large windows in the south & east corner. The south window should align and have the same width as the window beneath, while the east window should have the same width & height as the new one (Symmetric to this east window in the bedroom there is the bathroom bedroom – please see the attached photos & the plan)
- right next to the entrance, on the angled wall, I placed a “LEGO covering” much like this -
http://www.totalgeekdom.com/?p=650 (please open this link) where the kids can stick LEGO pieces on the wall and basically make a crazy tilted/upside-down world.
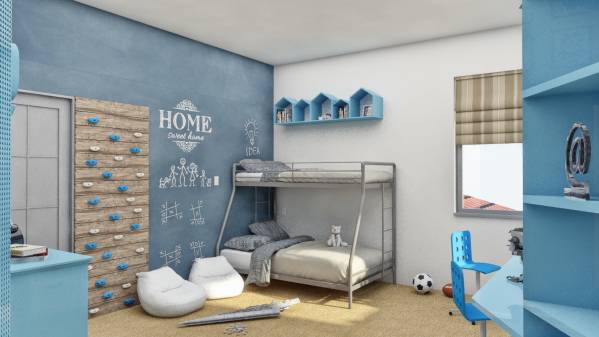
- for the wall between the bedroom and the dressing/bathroom I used navy blue chalkboard paint – it’s not that expensive and it is really cool, allowing your kids to draw and write on the wall.
- on the same wall I placed a climbing area where the kids can have fun - it is entirely optional, but it is a good way to exercise and keep fit.
- for the ceiling I used a 3-blade fan with an integrated lighting fixture.
- I used a mustard colored carpet, it goes well with blue, gray and white.
- there are a couple of other shelves I used, the whale one over the dresser and the little houses one over the bed – you may choose any models.
- I placed two beanbags by the bed for the kids to relax and read or rest after climbing
- you will need two adjustable height chairs for the desk – I used IKEA models.
ELECTRICAL
Lighting fixtures
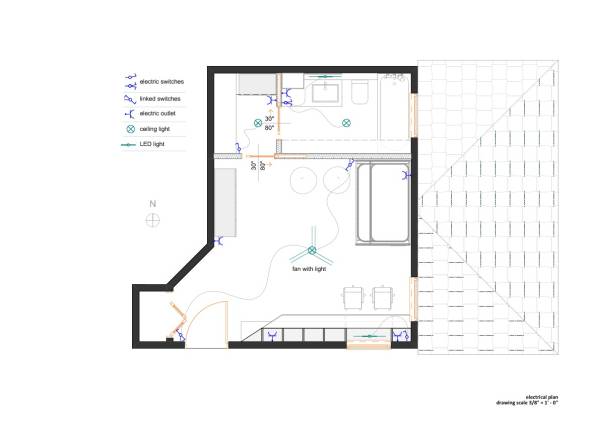
- for the bedroom there is a ceiling fan with incorporated light
- for the study area in the bedroom, incorporated in the upper part of the LEGO shelves there is another LED light
- a lighting fixture on the dressing room ceiling
- a lighting fixture on the bathroom ceiling and an LED light above the bathroom mirror.
Switches
- main switch – by the bedroom door (47” high) controls the main light and the fan
- secondary switch – by the bed (53“ high) also controls the main light and the fan – it works with the main switch – you can turn on the light from the door and turn it off from the bed.
- there is another switch in the south east corner under the the LEGO shelves (47” high) for a lighting fixture that is included in the upper part of the shelves, right above the south window, where I have placed the study/ homework area.
- inside the dressing, by the sliding door there is a switch for the dressing lighting fixture (34” high)
- in the bathroom, by the sliding door there is a switch (34” high) for the main lighting fixture and for the lighting fixture above the mirror.
Outlets
Technology is overwhelming us so we need more and more outlets J
- I have placed one on the West wall, near the dresser (16” high)
- two outlets under the LEGO shelves, one on each end (34”high)
- one outlet on the east wall, under the top bed (47“ high), so that the kids can both reach it to charge their phones, tablets, ipods, etc.
- one outlet in the dressing (just in case, 34” high)
- one outlet in the bathroom, under the switch (34” high)
I really hope you all enjoy it.
Thank you and have a nice day! 
 Mention honorable
Choix des votants